Getting Gauge

Why Gauge Matters by Tina Whitmore
Unless you have a particular fondness for frogging (or unknitting) your hard work, swatching is a must. When you make a swatch you determine many things: how you like the feel of the yarn, how this yarn knits up using particular needles (maybe you find you prefer metal over wood with certain yarns), the stiffness of the yarn based on gauge and how your knitting compares in tension with the manufacturer’s or pattern writer’s suggested gauge are but a few reasons.
When a designer writes a pattern, they will give you swatch specifications to try to match to make sure you end up with the correct results following their instructions. If your gauge is off, meaning, the you have fewer or more stitches or rows in your swatch, it will throw off all your measurements for your project and you will unhappily end up with a sweater 2 sizes too small or a hat that could fit a Yeti.
Let’s start with what a manufacturer suggests..theoretically, the figures provided for you on a yarn label are what the yarn distributor or manufacturer has determined based on what they perceive to be the ‘average’ knitter. But here’s the rub.. the yarn shown in the picture to the left is distributed by two different companies. Company A says the yarn knits up at 5 sts/1″ on 4mm needles. Company B says the yarn knits up at 5 1/2 sts/1″ on 4mm needles. At least they agree on what needles should be used!
As part of my little swatching experiment, the swatches shown here were all done using the same yarn, and same needles, on the same day. We all cast on 25 sts and worked 20 rows in stockinette stitch. Now even at this quick glance one can already see a difference between each swatch. It should also be noted that between the four of us that made up these swatches, we have well over 100 years of combined knitting experience, so be aware that experience makes no difference in your gauge, you don’t get to a point after X number of years and suddenly your gauge is always correct!

Tess was my first victim. She came
up with 11 sts and 14.5 rows over 2″. She was right in line with Company B’s gauge.
Next was Sue, she worked up the sample at 11.5 sts and 15 rows, so hers was a smidgen tighter
all around.

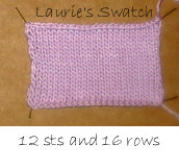
Then Laurie knitted up her swatch which ended up the tightest of all at 12 sts and 16 rows over 2″,
and I did mine last and it landed in between Sue’s and Laurie’s at
12 sts and 15 rows
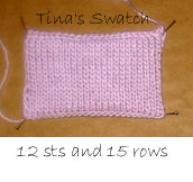
Note that none of us ended up with the same gauge as Company A using the needle size suggested.
So, what is the significance of all this? Well, imagine the four of us decided to make a raglan sweater and the sizes on the pattern are S, M and L. Let’s say the smallest size has a cast on of 90 sts, the M is 95 sts and the Large 100 sts. We each decide to make the Medium. Skipping on the swatch, we each pick up our 4 mm needles and start knitting away. The medium, according to the pattern, should be 19″ wide at the given gauge of 5 sts and 7 rows/inch (or 20 sts x 28 rows over 4″). We knit away for a few hours and then take a look at what we’ve got:
Tess measures her sweater front.. 17.25 inches wide! That’s 1.75 inches too narrow on the front alone, and will be 3.5 inches too narrow around the whole sweater, and the row count? Well, she’s at 7.25 rows to the inch, a bit on the short side, she probably should have jumped up a needle size to 4.5mm to get the gauge required.
How about Sue? – She’s getting 5.75 sts/inch, in other words her sweater is even narrower at 16.5″, way smaller than the Small, and 5 inches narrower around the whole garment.
My sweater, well that one is 15″ wide and way on the short side.. the raglan sleeves will never fit in the armholes properly.
And Laurie? Same again. Her sweater is all of 15″ wide. Not good..For comparison, let’s add in a fifth imaginary sweater maker who is getting a gauge of 4.5 sts to the inch, their medium sweater is turning out to be 21″ wide, 2 inches wider all around than the large should be. Short of swallowing up those extra inches in the seams, it also turns out the row count is equally loose and the sleeves are looking way too long to fit in the armholes on the sweater.
We’ve just learned the hard way that our knitting is not the same tension as the designer’s. That difference of 1 little stitch per inch between Tess’s swatch and Laurie’s and mine makes the difference between a medium adult sweater and a child size sweater (let alone the sleeve fitting issues).
Some things to keep in mind when swatching:
- Make sure you use the same needles you will be using for your project, if you plan to use wood needles, then swatch on wood needles, the slipperiness of the yarn on your needles will affect your tension.
- Likewise, don’t swatch on straight needles only to knit on circulars, your gauge, in general, will be tighter on circular needles.
- Don’t rely completely on the ball band for gauge information, you should also look at yardage and weight of your yarn. If using a different yarn than what is called for in a pattern, the yardage and weight will be a far more accurate comparison between different yarns, keep in mind the fiber content too, wool may shrink, and cotton may stretch.
- Don’t skimp on your swatch, a 4″ square will give you more accurate information than a 2″ one, your stitches will settle in on a larger swatch and your work will be more even over a longer stretch of knitting.
- Don’t waste your time making a swatch if you aren’t going to block the swatch before measuring it. This means then that you also aren’t allowed to complain when the item is a crazy shape or size. The point of a swatch is accuracy, take your time, do it right. You will save time in the end.
- Different yarns behave differently, wool is springy, cotton and silk will stretch, chenille has the mysterious ability to grow overnight. To be sure of your accuracy you will want to block your swatch, leave it to dry, and if humidity changes much in your area, you may look at leaving your swatch overnight to see if any further changes occur in your measurements.
- Likewise, don’t measure your swatch near your edges, your cast on or your cast off, find a spot where the stitches are the most even, swatches often splay out at the cast on or cast off, and edges can be bumpy and affect your count.
- If there is a stitch pattern, and the designer calls for a swatch using that stitch pattern, then do so, it’s also a great opportunity for you to test run the stitch pattern so it becomes familiar, better to make errors on a swatch than on your garment!
- Don’t swatch in the poor light, or when you are feeling tense. You may want to unwind with some knitting after a long stretch in rush hour traffic, but you are better off taking the dog for a walk first. Grumpy knitters make tight stitches!
- Keep in mind that if you rip out and restart a swatch that the yarn may have stretched from its first use, affecting your gauge on the 2nd try; again, block your swatch to get an accurate read.
- It is fairly easy to adjust needle size up or down to get the stitch gauge; row gauge can often be more challenging. Sometimes it may seem impossible to achieve the magic combination of stitch and row gauge and that these numbers must have been pulled from Mars! If you can get your stitch gauge correct and your row gauge close, then look at possibly making minor pattern adjustments instead of endlessly swatching your life away. Swatching is good thing, but we’re all here for the knitting in the end!
A very special thank you to Tess, Sue and Laurie of Greenwich Yarn for knitting with me on Saturday – I hope you enjoyed this little experiment!